With Windows 10 support ending and the time for Windows 11 finally dawning, it was time to either upgrade or to switch.
For years linux had been one too hard to get into or full of problems but that all changed with the coming of Linux mint.
Linux mint has allowed for seamless transitioning for Windows users with their workflows intact with it’s desktop looking and feeling 1:1 except more snappier and fluid.
This guide is here to help you finally take the plunge.
Here’s what we’ll need:
You can easily get the 64gb Sandisk pendrive on Amazon. After that, once you have it insert it into your PC.
Download Balena Etcher or Rofus Etcher from the Internet. I recommend Balena but if you run into any issues, try Rofus.
Before we go further let us discuss the different versions of Linux mint. There are 3 of them and the choice is entirely yours.
- Linux mint cinnamon version – complete and feature rich
- Linux mint Mate version – simple
- Linux mint xfce version – minimal and fast
You can download any one from the given link above.
Once you have the linux image file and balena etcher downloaded you’re ready for the next step.
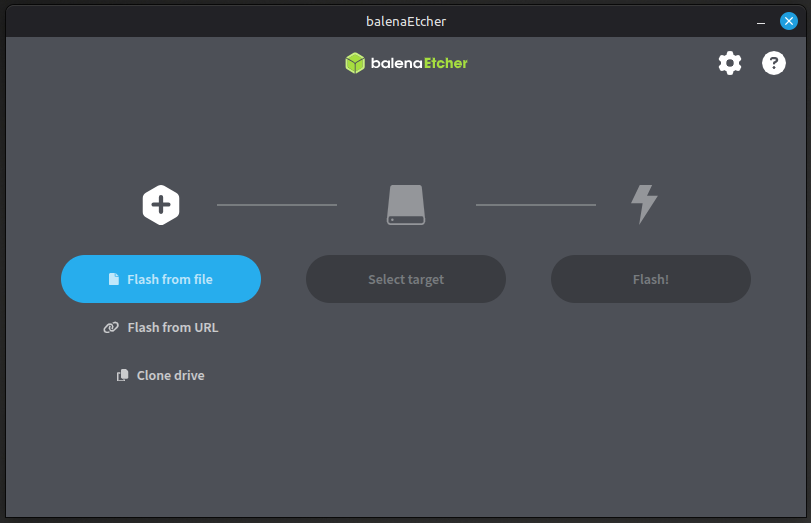
Open the Balena etcher and click Flash from file. Here select the Linux mint image that you have downloaded. Insert the pendrive you have with you and select that as the target and finally click Flash!
This will start the writing process followed by the verification process. Once done you will have your linux mint bootable pendrive.
Now open your windows start menu and type “Advanced boot options” and enter.
You will find settings prompting a restart for advanced boot. Press Restart and then select UEFI USB.
Your PC will restart and you will boot into the Linux Mint Desktop!
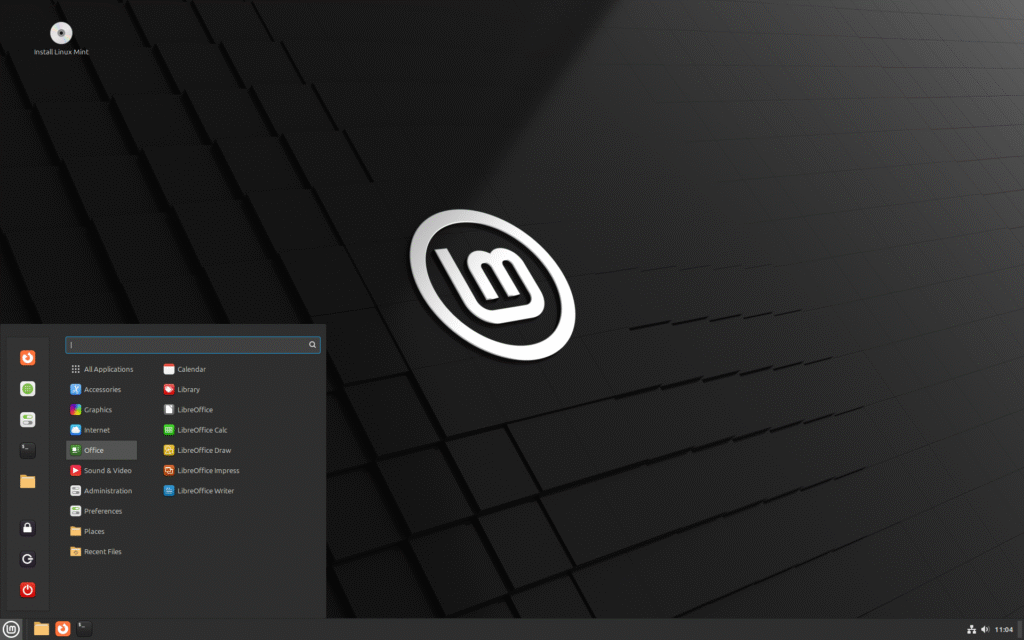
Fortunately for us Linux mint by default allows us a live session where you can experiment with it to your hearts content without messing up either system. All changes you do here are going to be temporary!
Play with the look and feel of the desktop and if you feel this is the right Linux Distribution for you only then move on to the following section.
Backing Up Data:
To proceed with our Linux installation we will have to format our boot drive. You can choose to boot back into windows and back up all your data. It is recommended to do so for the other drives as well so you can format them into ext4 format (linux’s filesystem) from ntfs (window’s filesystem). But for now only the boot drive is strictly needed for formatting.
Now once you are ready. Click on the Install Linux Mint, in the Linux Mint’s start menu or desktop icon.
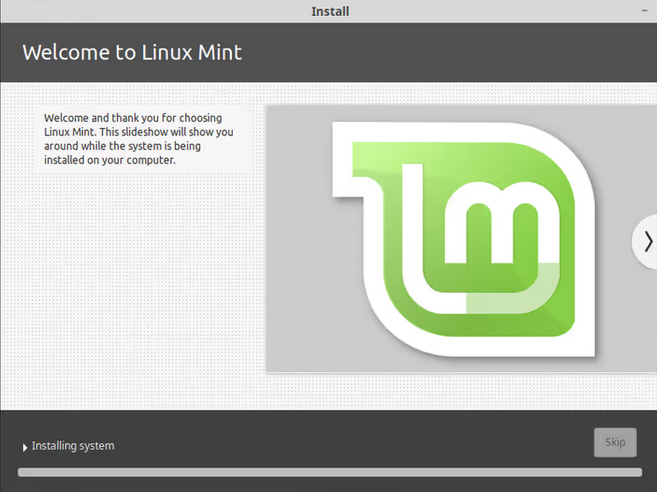
Now you will be greeted with the linux mint’s installation wizard. Follow through and you will start the installation process.
Finally you will have booted into Linux Mint as your new operating system!
Now a few other things, it is recommended to format all your other drives into ext4 format. You can do this at your leisure after backing up their data. This is to ensure there are no filesystem permission issues. You also cannot game on an ntfs filesystem drive so it is doubling important depending on your priorities.
Congratulations! You are now a proud owner of a Linux PC or laptop.