
You have just bought yourself a new and wonderful Raspberry Pi but have no idea how to actually connect it and make it work?
This guide is for you.
Here’s what you’ll need:
- A Raspberry pi
- Official Power Supply
- Micro HDMI to HDMI Cable
- 64gb Sandisk SDcard
- Any Monitor or Display
- Keyboard and Mouse
Once you have the hardware ready it is time to install the Operating system on it.
To do so, install the Raspberry pi 5 Imager from the official website.
Insert the 64gb Sandisk SDcard into your PC through an SDcard reader and start the Imager.
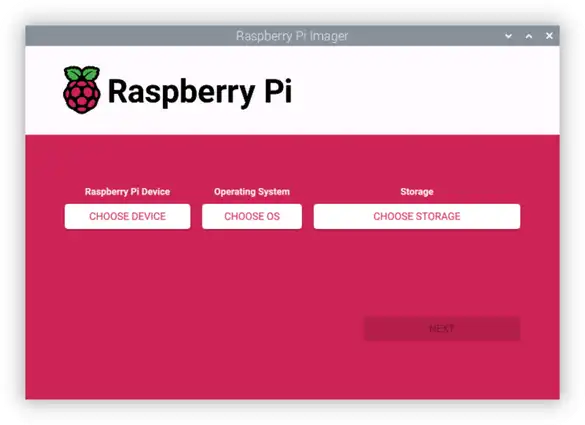
Select Raspberry pi 5 from the categories given, then the latest Raspberry PI OS at the time then finally select our 64gb Sandisk SDcard and start the process.
It will start writing the Operating system onto the SDCard.
Once completed insert the SDCard into the SDcard slot of the Raspberry PI (it is right underneath it) then plug in the wires.
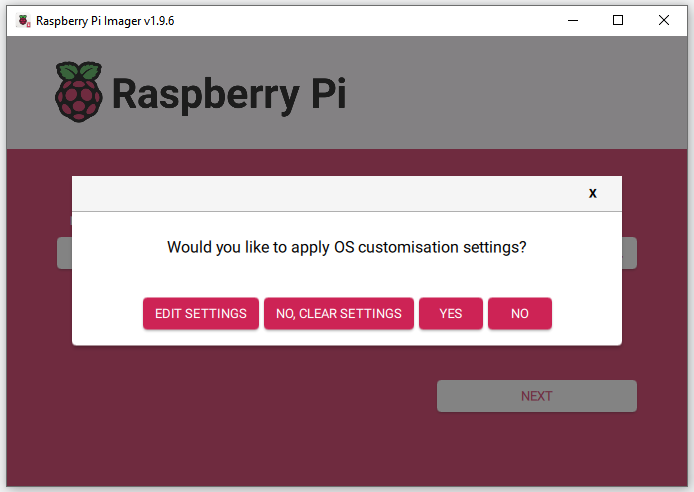
Now select Raspberry pi 5 from the categories given, then the latest Raspberry PI OS at the time then finally select our 64gb Sandisk SDcard and press “Next”. You’ll be prompted to customise OS settings. Enter “Edit Settings”.
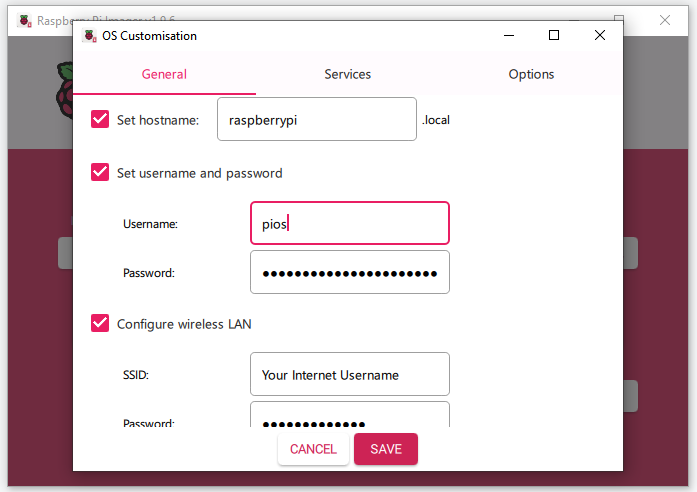
Fill in username, password as well as your Wifi username and passowrd for seamless internet connectivity once the device is connected.
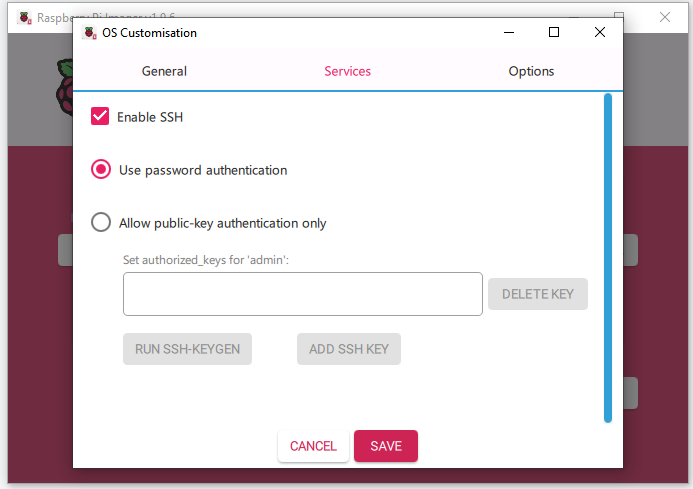
In the Services tab enable SSH
Once done press yes to start the writing process.
Now insert the SDcard into the Pi and connect the power supply.
Now open your terminal. Enter the ssh command. This command will be: ssh yourusername@password that you have just set.
Do not worry about not seeing the password being written, it is just invisible for security purposes.
Now you should have connected your Raspberry pi headlessly! Congraulations!
Now for Direct connections connect the Micro HDMI to the micro HDMI slot , it’s other end to the TV we want to use and you should see the the display boot up.
These were the 2 ways you can actually start using the Raspberry Pi.
2 thoughts on “How To Actually Set Up A Raspberry Pi – A Comprehensive Beginners Guide”