
Do you have an old TV lying around gathering dust?
Do you wish you had a Smart TV but they’re all too expensive?
Then this project is for you! Turn any old TV “idiot boxes” as they used to call them into a “Smarter than Smart TV” by attaching a Raspberry Pi 5 to it.
Completely free, running Ubuntu Linux.
And the best part? No ecosystems locking you in.
Here’s what you’ll need:
It is important that we use the 16gb Raspberry Pi variant for this for seamless 1080p video viewing. The 8gb variant will do as well but for 720p.
Once you have the hardware ready it is time to install the Operating system on it.
To do so, install the Raspberry pi 5 Imager from the official website.
https://www.raspberrypi.com/software
Insert the 64gb Sandisk SDcard into your PC and start the Imager.
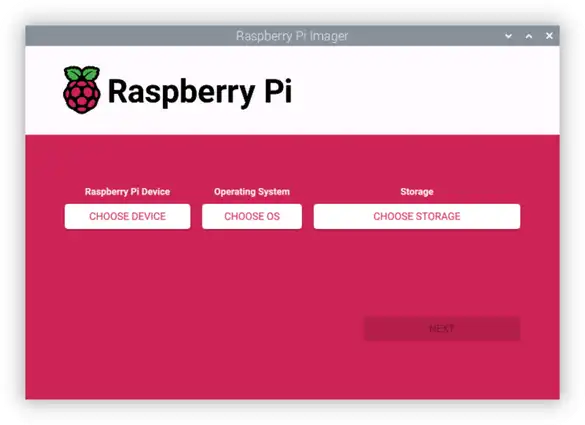
Select Raspberry pi 5 from the categories given, then the latest Raspberry PI OS at the time then finally select our 64gb Sandisk SDcard and start the process.
It will start writing the Operating system onto the SDCard.
Once completed insert the SDCard into the SDcard slot of the Raspberry PI (it is right underneath it) then plug in the wires.
Micro HDMI to the micro HDMI slot , it’s other end to the TV we want to use. Official power supply goes into the Type C slot. Finally, the dongle of our Logitech K400+ keyboard into one of the USB slots.
We now start the TV and turn it the HDMI mode using it’s remote.
And done! We should have picture of our Raspberry Pi OS.
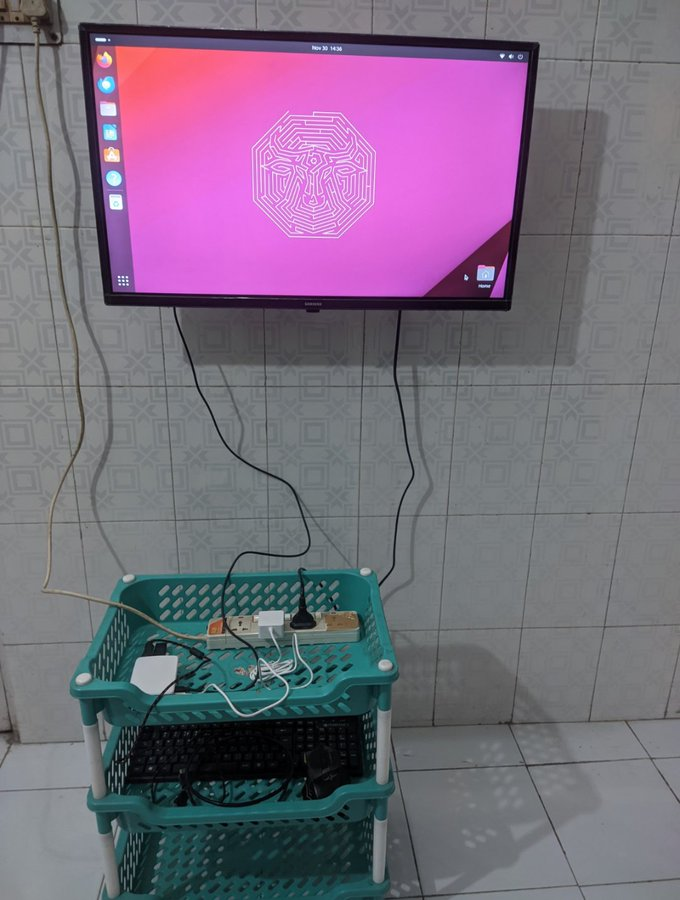
This is basically a remote controlled PC. Allowing you to browse the internet through Firefox and your wireless keyboard. The Logitech K400+ Keyboard is the perfect keyboard for that purpose.
Whether it’s Netflix, Hulu, Disney Plus, Peacock you can just browse it without any issues!